Introduction:
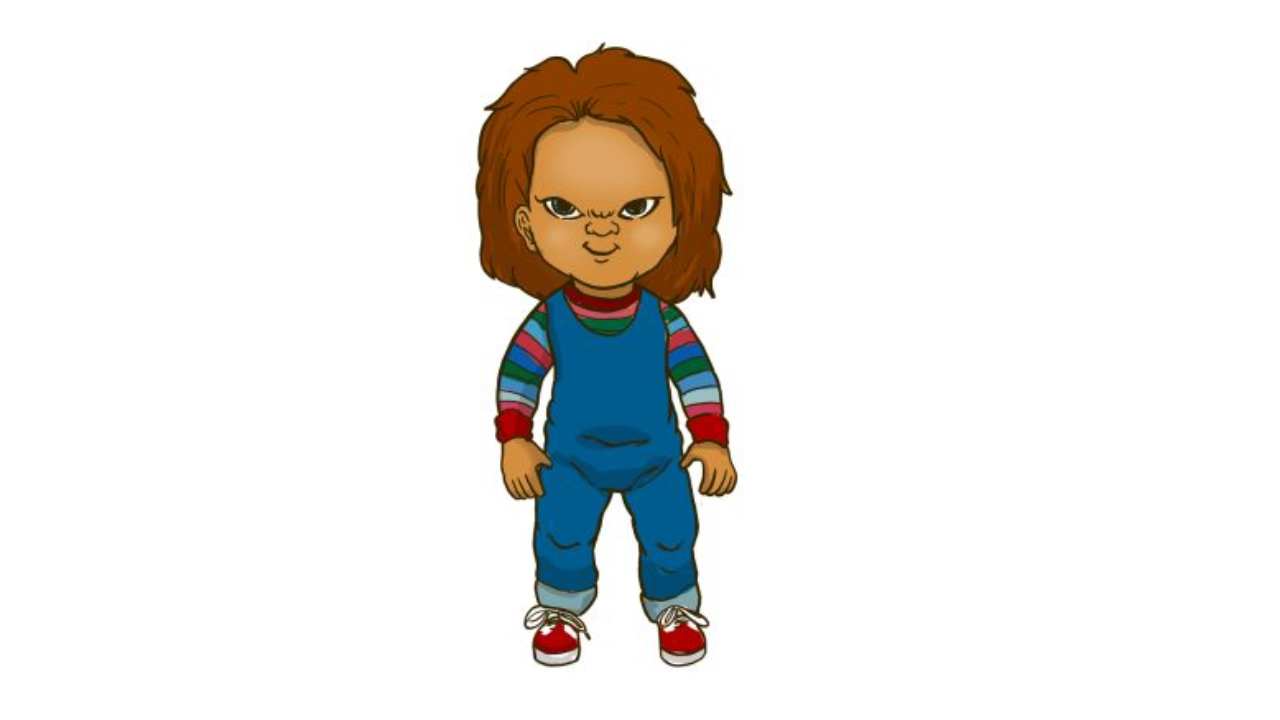
Draw Chucky, the notorious executioner doll from the blood and gore flick establishment “A Piece of Cake,” has become famous in the repulsiveness classification. With his unmistakable elements and ghostly articulation, Chucky makes for an intriguing subject for specialists hoping to challenge their drawing abilities. This bit-by-bit guide will walk you through the most common way of drawing Chucky, catching his vile substance on paper.
Also, please check out our simple Turkey coloring pages.
Materials You Will Need:
Before we jump into the drawing system, how about we accumulate the materials you’ll require:
Drawing Paper: Select a decent-quality drawing paper that can deal with different drawing mediums like pencils and markers.
Pencils: You’ll require a scope of pencils, from delicate (B) to hard (H), to accomplish various tones and surfaces in your drawing.
Eraser: An eraser will be fundamental for amending mix-ups and refining your drawing.
Markers or Pens: If you like to add inked lines or more characterized diagrams, markers or pens can be an incredible option.
Reference Picture: Have a reasonable reference picture of Chucky close by. This can be a still from a film or a great picture seen on the web.
Stage 1: Fundamental Blueprint
Begin by gently drawing a basic oval shape for Chucky’s head. Then, define an upward boundary down the focal point of the oval to assist you with setting the facial highlights precisely. Then, define a level boundary across the oval, situating it somewhat over the middle. This line will direct you in setting Chucky’s eyes.
Stage 2: Eyes and Face
Involving the even line as a source of perspective draws Chucky’s eyes. He has enormous, round eyes with a threatening look. Add his understudies, which should be skewed to upgrade his disrupting appearance. Underneath the eyes, draw his vile smile by outlining a bent line that stretches from one side of the face to the next.
Stage 3: Facial Subtleties
Chucky’s face is loaded up with scars and joins, giving him a rough and worn appearance. Utilize your reference picture to outline these subtleties around his eyes, mouth, and cheeks. Try not to stress over flawlessness at this stage; we will refine the subtleties later.
Stage 4: Hair and Eyebrows
Chucky has red hair that sticks up in a wild way. Utilize speedy, light strokes to draw his hair, remembering the bearing it streams. Add his eyebrows with short, spiked lines that convey his wicked and dangerous nature.
Stage 5: Body and Garments
Stretch out the oval shape descending to make Chucky’s body. Draw his overalls or striped shirt, focusing on the folds and wrinkles in the texture. Utilize your reference picture to guarantee precision in catching his outfit’s subtleties.
Stage 6: Arms and Hands
Sketch Chucky’s arms reaching out from his body. Remember his posture and the extent of his appendages. Draw his hands, which look somewhat frightening and overstated. Remember to outline his particular “Heroes” doll gloves.
Stage 7: Legs and Feet
Expand the lower part of the body to make Chucky’s legs. Draw his shoes, which are a significant piece of his general look. Chucky’s shoes ought to be straightforward yet obvious.
Stage 8: Refine and Add Subtleties
Since you have the essential layout of Chucky’s structure, now is the ideal time to refine the drawing and add more subtleties. Utilize a milder pencil (like a 2B or 4B) to obscure the lines and make concealing. Consider the reference picture closely to catch the scars, joints, and other characterizing highlights all over the body.
Stage 9: Concealing and Surface
Accomplishing a reasonable look requires cautious overshadowing. Use incubating and cross-bring-forth methods to add shadows and profundity to your drawing. Focus on the light source in your reference picture to guarantee steady overshadowing.
Stage 10: Discretionary Inking
You can use markers or pens to ink over the lines to add more definition and differentiation to your drawing. This step is discretionary and relies upon your favored style.
Stage 11: Last Contacts
Survey your drawing and make any fundamental changes. Utilize your eraser to tidy up any wanderer lines or smears. Add last contacts to the overshadowing and subtleties until you’re happy with the general outcome.
Your Chucky Drawing is Finished!
We trust you had a great time rejuvenating this loathsomeness symbol in this aide on the best way to draw Chucky! The plan for this character is misleading basic. He doesn’t look very complicated from the beginning, yet there are a ton of subtleties and components to depict while drawing him. That is why we separated it into more modest advances so you can perceive how simple it tends to be.
You can take all you learned here and make your own varieties. Depicting some of your number one Chucky minutes from the films would be great! At the point when your Chucky fine art is finished, we couldn’t imagine anything better than to perceive how you depicted this alarming doll. You can share the completed drawing process on our Facebook and Pinterest pages. That way, we can be alarmed and dazzled by your magnificent image of this renowned reprobate! We can hardly hold on to perceive how startling he looks.
Conclusion:
Drawing Chucky may be a test; however, with persistence, practice, and carefulness, you can portray this famous ghastliness character as dazzling. Recollect that each artisan’s style is interesting, so don’t hesitate for even a moment to add your touch to the drawing. Whether you’re a carefully prepared craftsman or a fledgling, this bit-by-bit guide has given you the devices to rejuvenate Chucky on paper. Thus, accumulate your materials, reference picture, and innovative soul, and leave on the exhilarating excursion of drawing Chucky from “Easy breezy.” For more information, please Click Here!